Friday, 12 July 2013

Bunting

Well M and I have had a lovely couple of days sewing, having sorted out the fabric scraps for the patches on the tent the other day, I decided we could use some of the fabric to make some bunting, something I've wanted to do for a while. So today we did and we are very happy with the results.


My triangles were 20cm wide by 22cm high, that seemed a nice size once you have sewn the seams. We made just over 3 metres of bunting.


We spent a while deciding which fabric and in which order they would use, which took a while as L  liked to take pieces of fabric to play with.


We then cut out 2 triangles in each fabric


and sewed them together along the long edges, don't sew across the base as you need to turn them inside out.


M busy sewing, she really has got the hang of sewing nice straight lines.


We then pressed each triangle and then pinned them to some bias binding,we used some that was 25mm wide and spaced the triangles 3cm apart.


Monday, 8 July 2013

Edible Finger Paint

My littlest ones has discovered the joys of mark making but also likes too put everything in their mouth, so this is a very simple home made paint that is ok if they eat some of it!

                                                    Edible Finger Paint

                                                    1/4 cup or 40g cornflour
                                                    1 cup of water or 280ml
                                                    food colouring

Place cornflour and water in a pan and heat, it will start to thicken, go slightly translucent and come away from the side of the pan, as soon as the translucent streaks appear, turn of the heat,  just remember to keep on stirring and it will thicken.
Then pour into your paint container and add food colouring


Ice Painting

Ice painting a perfect creative activity for a very hot day :) Mind you when I picked up the minded children from school and they asked "What are we doing today", they looked at me a bit funny when I answered with ice cube painting but there were smiles as well.

The night before I prepared an ice cube tray filled with water and mixed in different food colourings, it was then put in the freezer.


After 30 minutes they were beginning to freeze and after an hour most were ready to have an ice pop stick put into them and it would stay up.


When they first started  they only got a scrapping of colour


but as the ice slowly melted the colours began to flow


 to produce some lovely pictures, the children really liked the way the paint merged and spread out across the paper.


I loved the muted colours


Friday, 5 July 2013

Pirates and Treasure

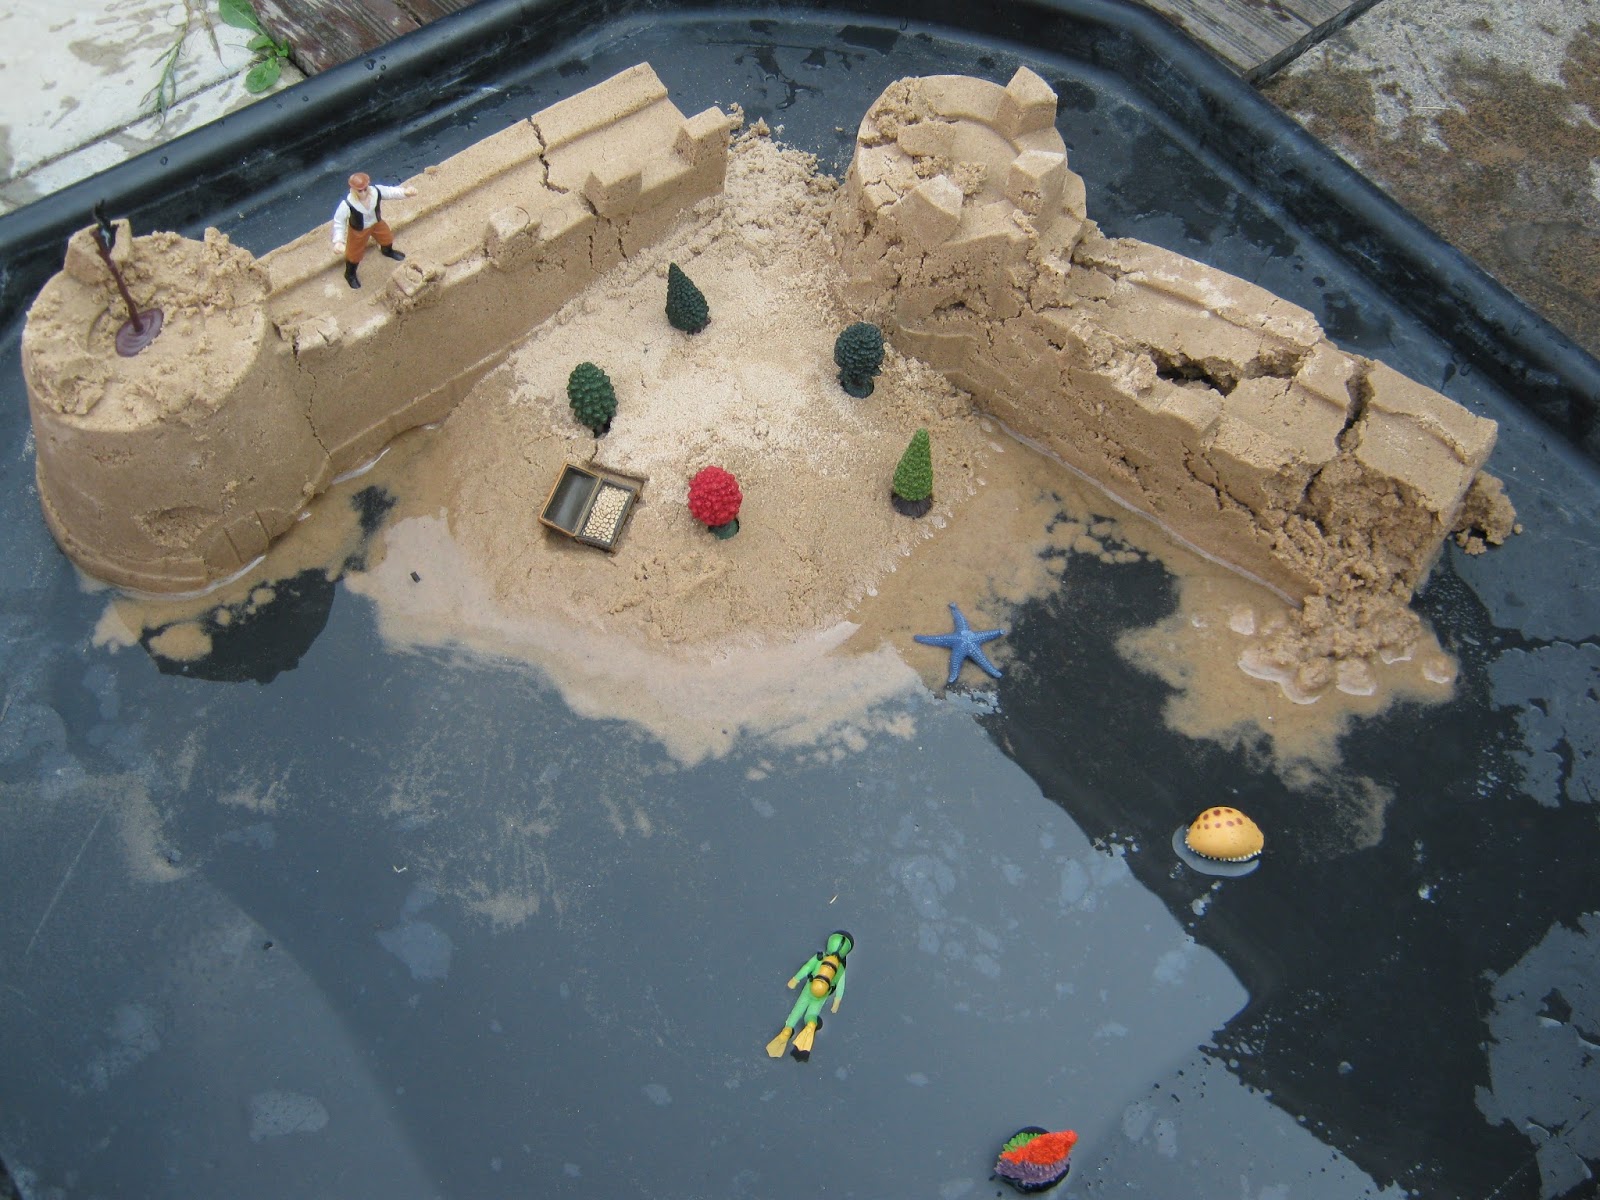
We had fun in the garden, making use of our tuff spot, sand and water to create a treasure island, complete with pirates and treasure chest.


They the decided, it needed a castle too, so out came the sand castle moulds


but it wasn't long before the discovered how much fun could be had by rearranging everything


and creating a new scene


then they discovered that really wet sand is great to go walking in!


treasure island is no more but lots of fun had.


Monday, 17 June 2013

Father's day

For Fathers day this year, I decided on a very simple card but hand prints usually go down well. This was easy then to do even with the babies.


but rather than just adding happy fathers day to the inside I found some poems about Dads and printed out some, then the children choose which one they wanted to put in their card. They enjoyed listening to the different poems (there were several) and trying to decide which ones their Dads would like best.


Wednesday, 5 June 2013

Sensory Bottles

We had one very wet afternoon during half term, so I decided this was a good time to make our sensory bottles for the littleones. The children had a lovely time deciding what they were going to put in the bottles, liquid or dry, quiet or noisy ect and also thinking about what the babies might like.


The shredded colour paper bottle had some rice added to it so it makes  a lovely sound.


Found a good use for those seeds that are past there use by date, the children said they didn't want to add too many as they were worried it would be too heavy for the babies to lift, which was a really sweet thought :)


Then we had mixture of bottles, bottle 1 glitter and water, bottle 2 glitter water and baby oil and bottle 3 glitter, baby oil, water and food colouring.

Thursday, 30 May 2013

No Mess Painting

I've seen no mess painting on other blogs and thought we would give it a go but they have always used a ziploc bag. We didn't have any of these and the only freezer bags we have are either blue or green in colour. I didn't feel they would work so well as the coloured bag would distort the colours of the paints. So I set about with a cardboard box and cling film. I tightly wrapped the cardboard in clingfilm.


The poured on the paint and tightly wrapped the paint and cardboard in another layer of cling film.


Now my first attempt was ok and you can see how much paint we used but quickly realised that you needed a lot more paint than I originally thought.


So for my second attempt we used three times the amount of paint, which worked a lot better. Our youngest one really enjoyed the experience


and they were very quickly joined by the other children.


I have been able to reuse the base as it was so well wrapped in clingfilm, that when I carefully remove the outer layer all I need to do is wash the paint of, leave to dry and then we are ready for another go.